By default, most Linux instances come with an 8GB root EBS volume unless you change it during the launch wizard. If you have forgotten to increase root volume during launch or you just need to extend because root volume has reached the critical level, follow this tutorial.
Note: The size of a volume can only be increased, not decreased.
Current root volume usage
We have an 8G root volume disk, which is now 92% used and has just 640M free space remaining. We need to extend this volume by 22G, Total size will become 30G.

Before resizing the volume, you need to remember the below points
- Power off the VM (This will ensure data integrity)
- Take a snapshot of volume (You can revert to the old state in case something goes wrong )
Find the Volume
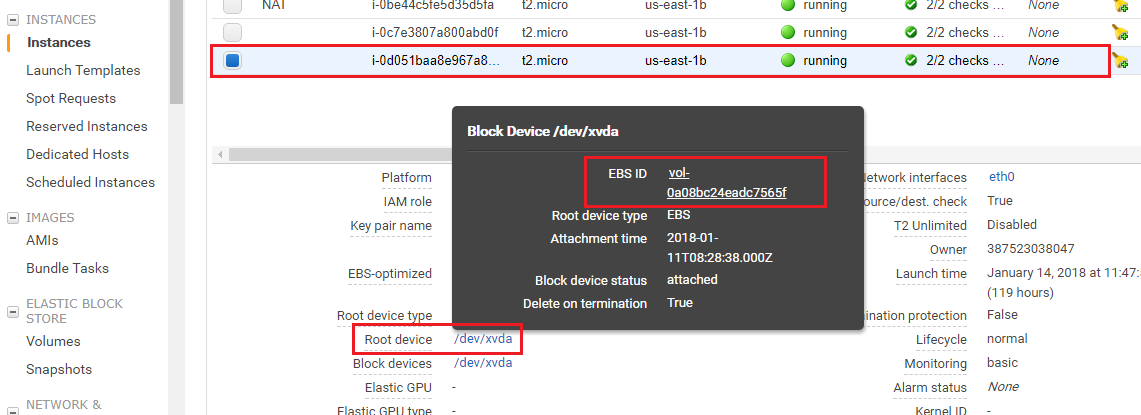
When you have multiple EC2 instances running and their Volumes are not tagged, you may find it difficult to identify the right root Volume. First, let us find the volume ID that needs to be resized.
Login to the Ec2 console and select the EC2 instance for which the root volume needs to be increased. Under the “Description” tab, you will see the root device name “/dev/xvda”, click it. It will now open a small pop-up box containing this volume information. Click on EBS Volume ID to redirect you to the “Volume” management page where you can take a snapshot and modify its size.
Take a Volume Snapshot
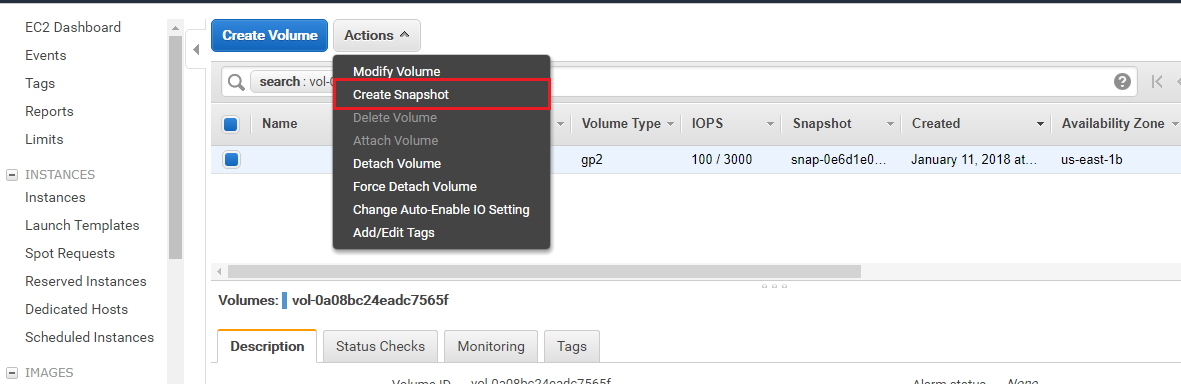
On the “Volume” management page, select the volume to be resized and click “Create Snapshot” under the “Actions” menu
Now provide a Name and Description for our Root volume device
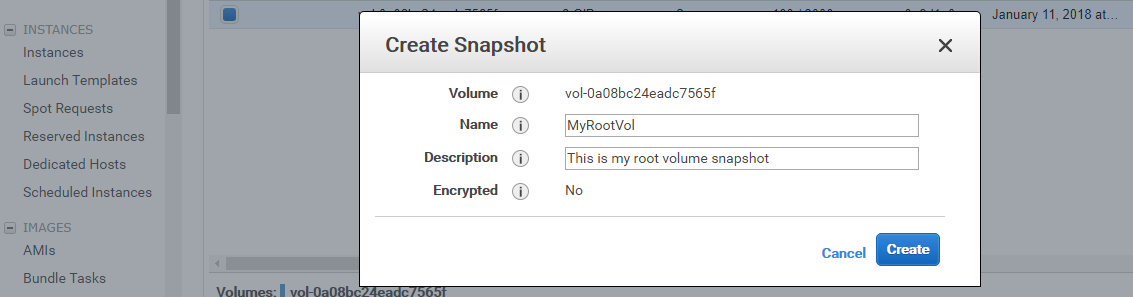
Once the Snapshot is created, note down its ID for future reference.
Resizing (Extending Volume size)
There are two ways to resize the partition,
- Warm resize [Easy]
- Using snapshot
1. Warm resize method
This method is easy and simple to follow, you just have to select the volume and modify its size. Remember, you can only extend its size.
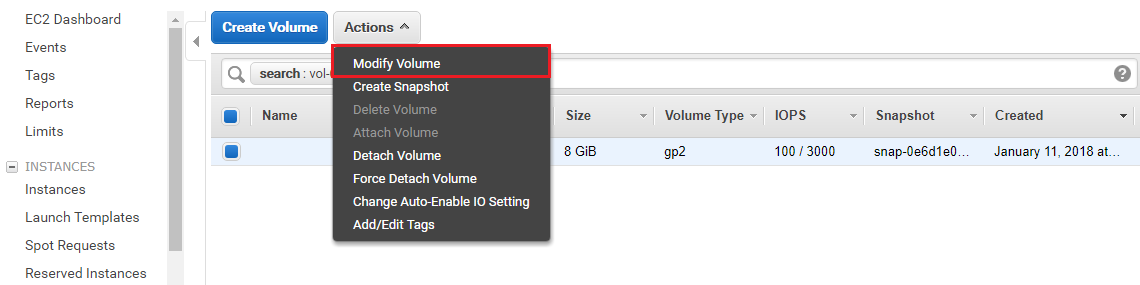
Click “Modify Volume” under the “Actions” menu
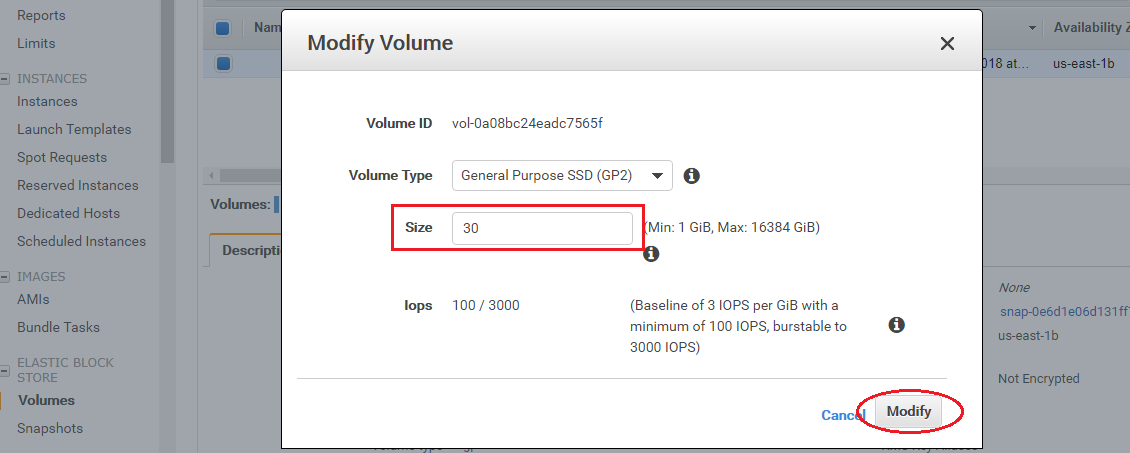
Now enter the size for your root volume. Before clicking the “Modify” button, make sure that you have “STOPPED” the instance. Modifying the Volume on the running server may end up with partition corruption.
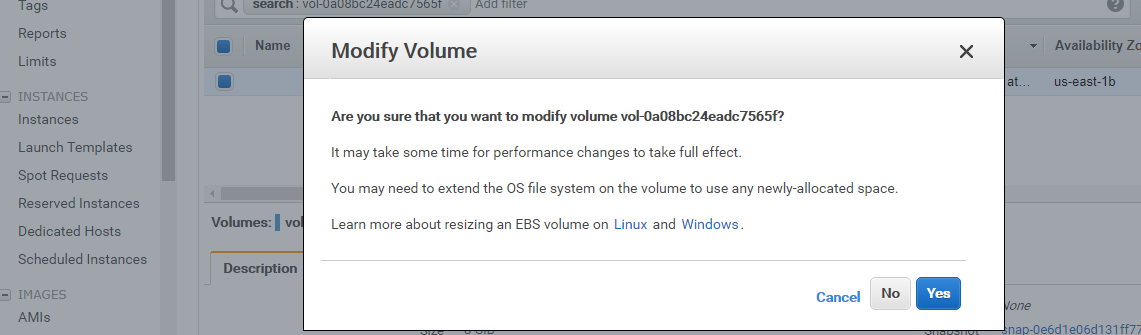
Once you ensure the instance is in a stooped state and you have entered the correct volume size to resize the root volume, Click “Yes”.
Now SSH into your instance and notice that root volume has extended from 8G to 30G successfully.

In some scenarios it may show the same volume size, simply execute the below command to update the root volume file system. It should now show the correct filesystem size.
resize2fs /dev/xvda12. Resize Using a snapshot
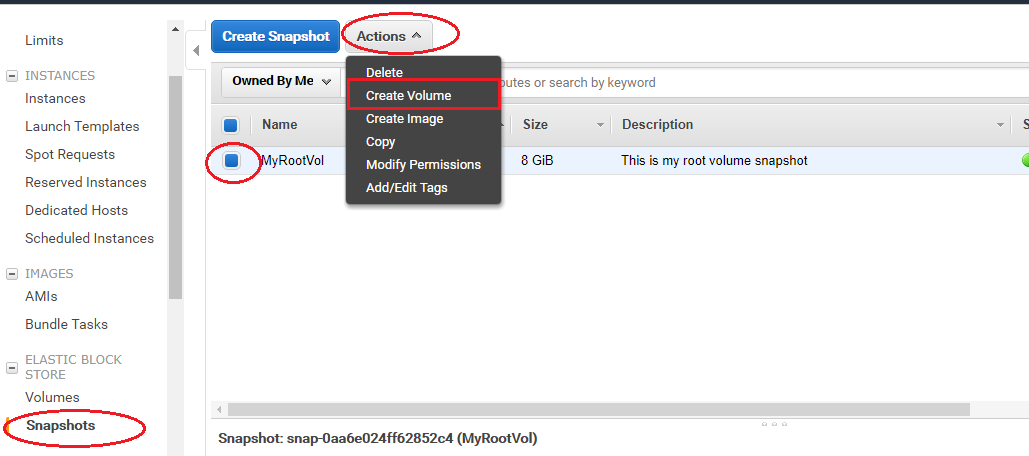
Now select the snapshot that you have taken before. Create volume from this Snapshot by clicking “Create Volume” under the “Actions” menu.
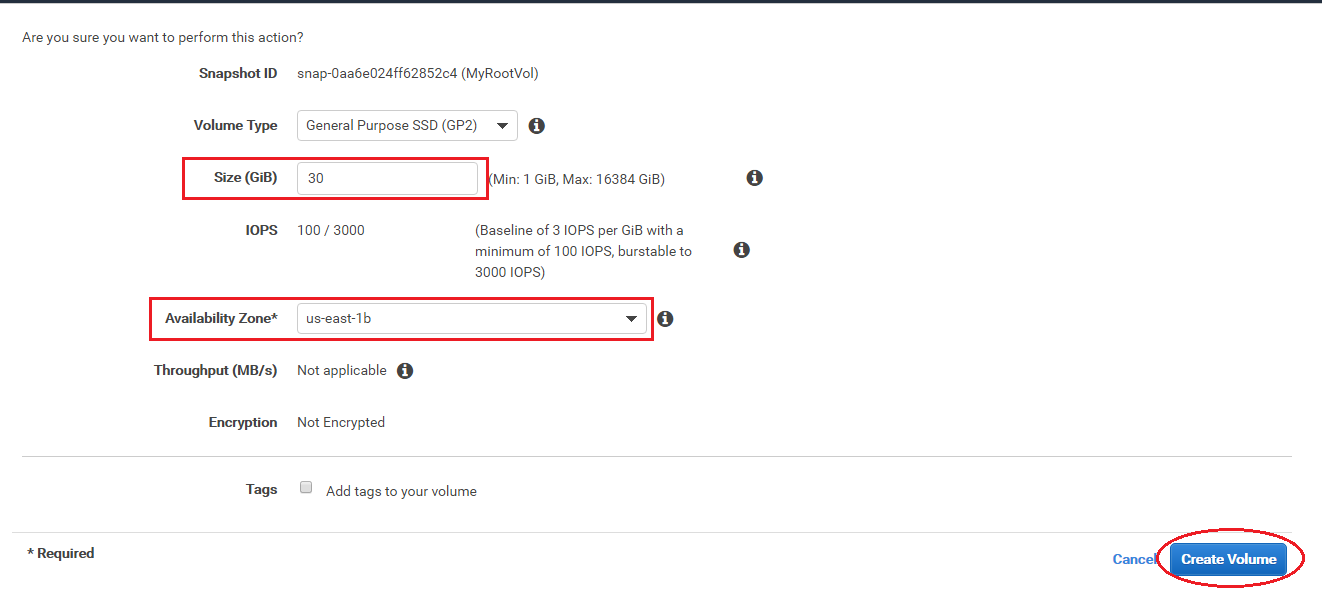
Now enter the volume size, say 30G, and choose “Availability zone” where EC2 was launched. In our case, we did launch Ec2 in the “us-east-1b” zone, selected it from the dropdown menu, and clicked “Create Volume”.
Now new Volume will be created with size 30G. Note down its ID for future reference.
Detach Volume
Now STOP the instance and detach the root volume.
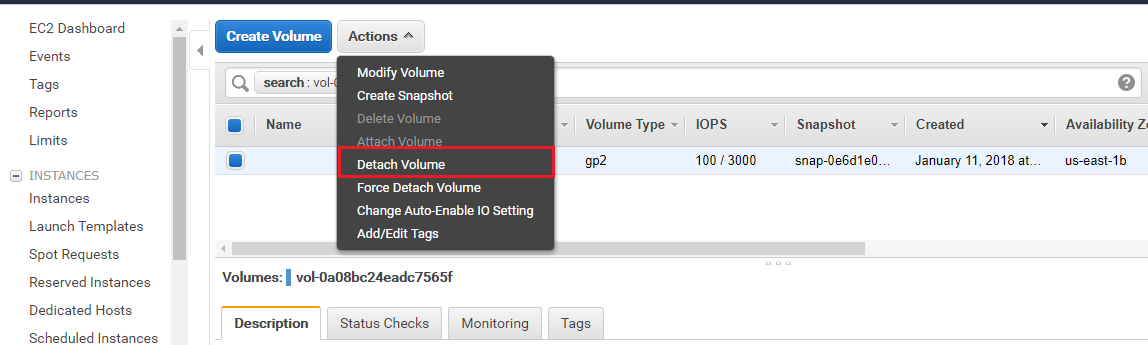
Click “Yes, detach”, it should now detach this volume from the EC2 instance. You will notice the state of this volume changing from “In use” to “Available”
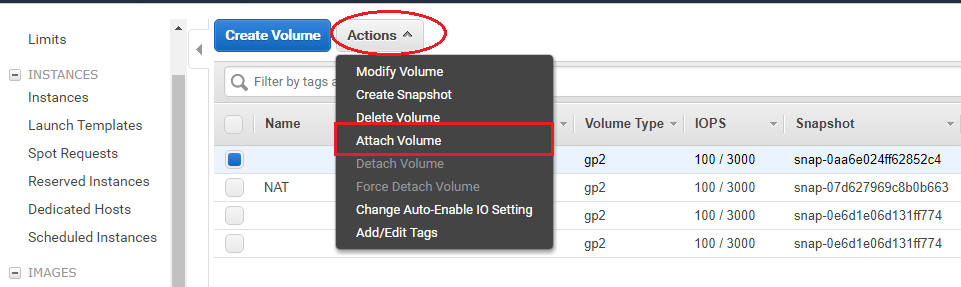
Volume attachment
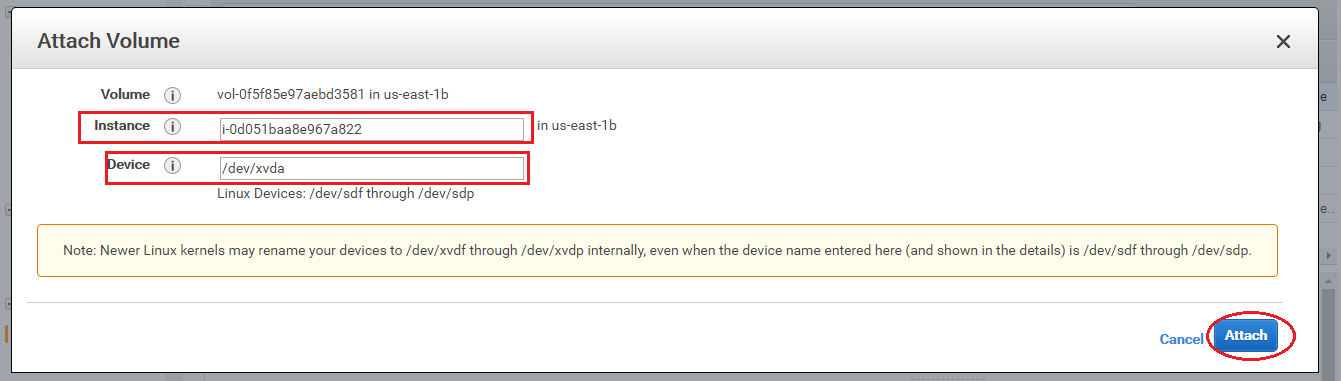
Now Copy the instance ID of our stooped instance. Identify our newly created volume off snapshot (30G size), select it, and attach it to our instance.
An important thing to note here is the “Device” name. You must replace the existing entry with “/dev/xvda“, otherwise it won’t be detected by the Operating System as root volume.
Once it is attached to our instance, Power it on and ssh into it. Execute df -h / and notice root volume size.
[root@ip-10-0-1-159 ~]# df -h /
Filesystem Size Used Avail Use% Mounted on
/dev/xvda1 30G 7.1G 23G 24% /
As you can see from the above output, root device /dev/xvda1 has been successfully extended to 30G.
In some scenarios it may not show increased volume size, simply execute the below command to update the root volume file system. It should now show the correct filesystem size.
resize2fs /dev/xvda1Thank you for taking the time to read our blog on “How to Extend the Root Partition Of EC2 – EBS Volume?.” We hope you found the information valuable and insightful. If you find any issues with the information provided in this blog don’t hesitate to contact us (info@assistanz.com).
Optimize server speed and never lose a valuable customer again!
Our mission is to ensure that your server remains lightning-fast and protected by monitoring and maintaining it 24×7 with our experts.