Ever feel like your Linux system is lagging? Do you wish to have the responsiveness of lightning rather than the sloth-like performance you currently have? Then RAID 0 might be the answer you’re looking for.
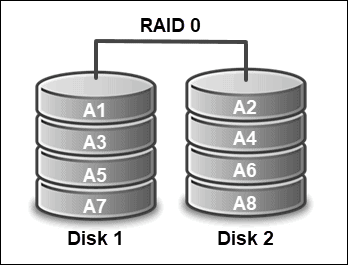
Imagine a highway with a single lane. That’s how data travels on a regular disk – one byte at a time. But with RAID 0, it’s like adding multiple lanes to the highway. Data gets sliced into stripes and zooms across all the disks in your array, giving you a significant performance boost. Sounds pretty cool, right?
Is RAID 0 Right for You?
Think about it like this:
- Need a temporary speed boost for non-critical tasks? (think video editing with readily available source files) RAID 0 might be your champion.
- Working with easily recreated data? (like temporary website assets with backups in place) RAID 0 could be a contender.
- Do you have a serious case of the “oops-I-deleted-my-files” jitters? Then RAID 0 is not your friend.
How to set up RAID 0?
For this tutorial, we took two hard disks having the same size (10 GB) and running on the CentOS 7 operating system.
Step 1: Installation of mdadm package
To install the mdadm package on your system use the following command
[root@localhost ~]# yum update
[root@localhost ~]# yum install mdadm -y
Step 2: Create a partition
From the installed package, use the following command to create a partition between the hard disk.
[root@localhost ~]# lsblk
[root@localhost ~]# fdisk /dev/sdb
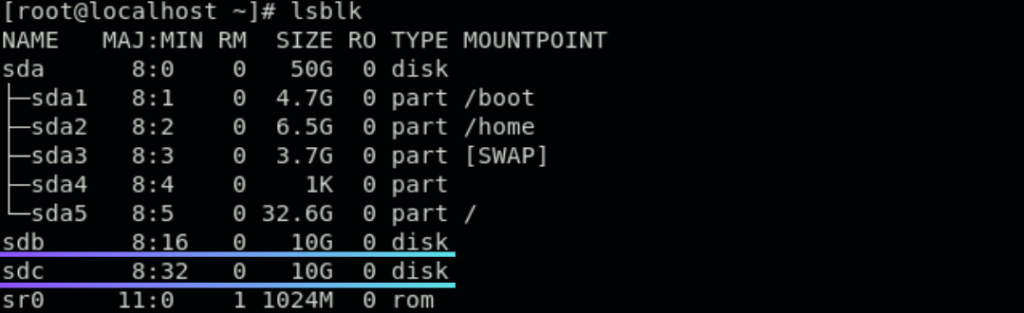
Note: The lsblk command displays the available block devices, whereas the fdisk command launches the partition.
Once the partition starts type the following command,
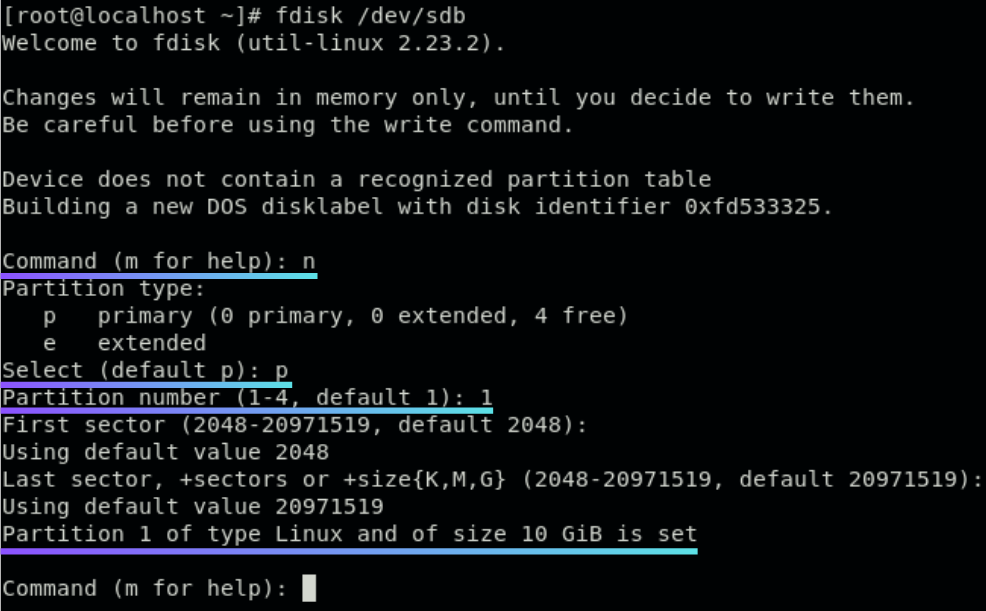
Note: Type “n” to start a new partition. To choose the primary partition, type ‘p’. therefore 1 is the the partition number. The default value is selected the second time you press the enter key.

Note: To opt for partition, type ‘t’ and hit enter ‘l’. It displays the kind that is accessible.
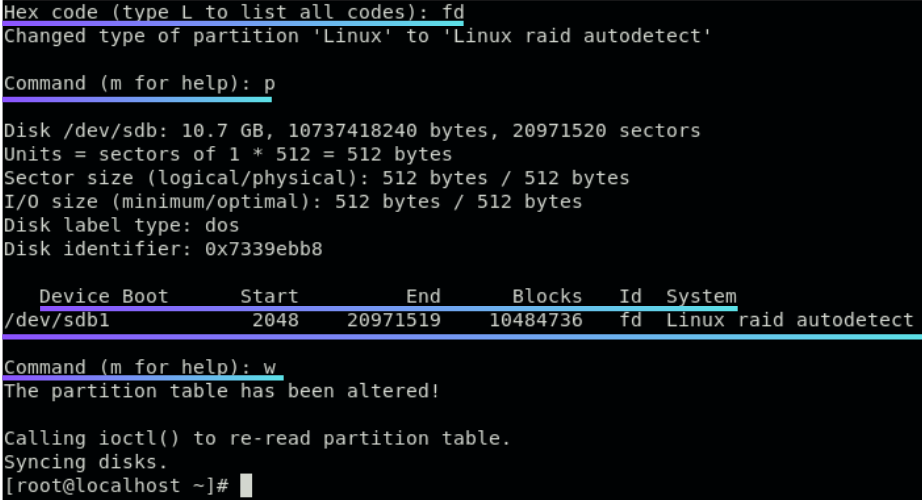
Note: Now type ‘fd'(Linux raid autodetect). Next, the ‘p’ detail regarding the partition /dev/sdb.Enter ‘w’ to end the partition as you type. Repeat the above procedure in /dev/sdc
Step 3: Creation of raid md device
As soon as the partition has been created successfully, we need to create a raid md device, which can be achieved by running the following commands.
[root@localhost ~]# mdadm –-create /dev/md0
–-level=stripe –raid-devices=2 /dev/sd[b-c]1

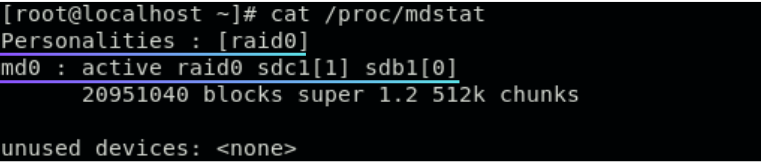
Step 4: Verifying the status of the raid array
Now since our raid md device is created successfully. Verify the changes using the below command.
[root@localhost ~]# cat /proc/mdstat
[root@localhost ~]# mdadm –-examine /dev/sd[b-c]1
[root@localhost ~]# mdadm –-detail /dev/md0
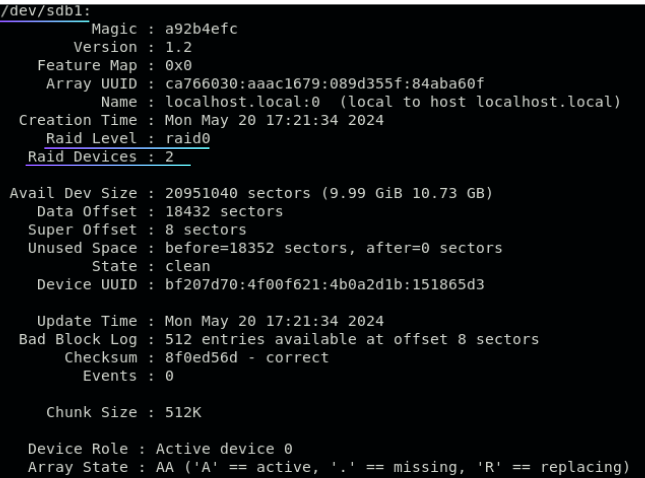
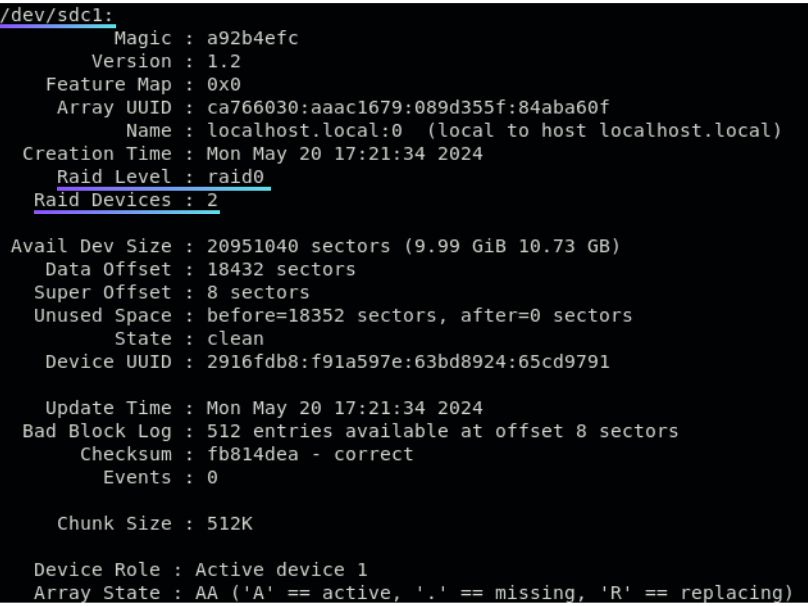
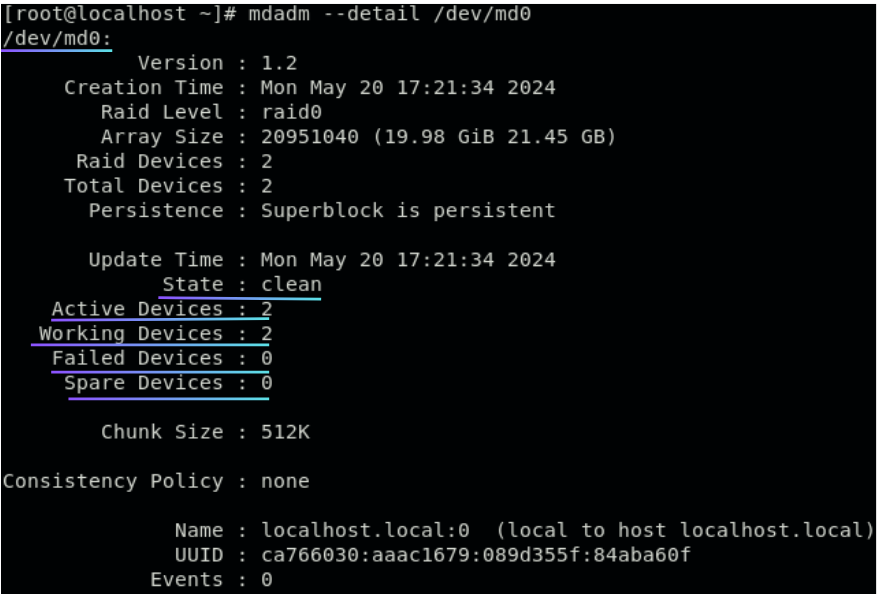

Note: Use the above command and verify the raid status(active device, raid level, array size, etc….)
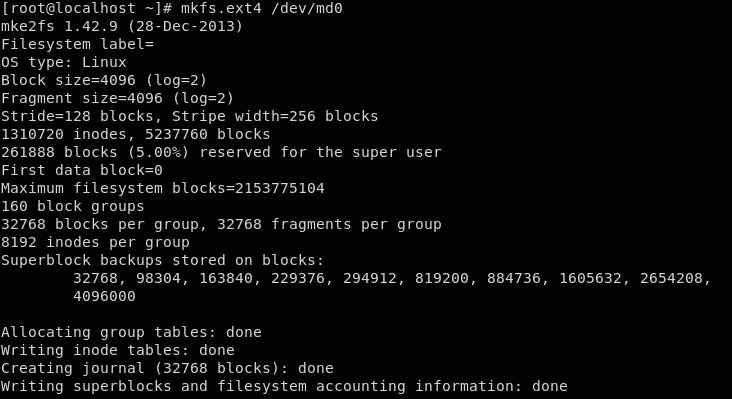
Step 5: Make a file system in your raid devices
Now since our raid array is ready, we will create a filesystem, so it can be used for storing data. For this use the following command
[root@localhost ~]# mkfs.ext4 /dev/md0
Step 6: make a directory and mounting
Next, we need to make a directory and mount it to the system.
[root@localhost ~]# mkdir /mnt/raid0
[root@localhost ~]# mount /dev/md0 /mnt/raid0
[root@localhost ~]# df -h
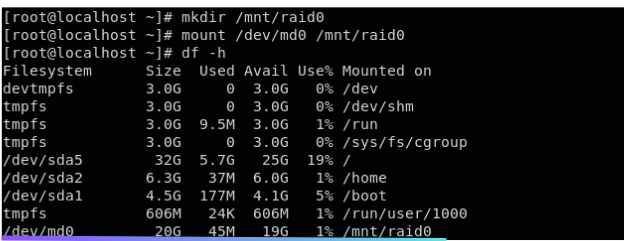
Note: The df command is used to verify /dev/mdo which is mounted under /mnt/raid0.
Step 7: create file and content of the mount directory
Next after creating and mounting the dictionary, we need to create a file and content for the mounted dictionary
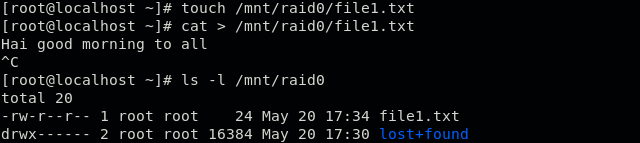
[root@localhost ~]# touch /mnt/raid0/file1.txt
[root@localhost ~]# cat > /mnt/raid0/file1.txt
Hai good morning to all
^c
[root@localhost ~]# ls -l /mnt/raid0/
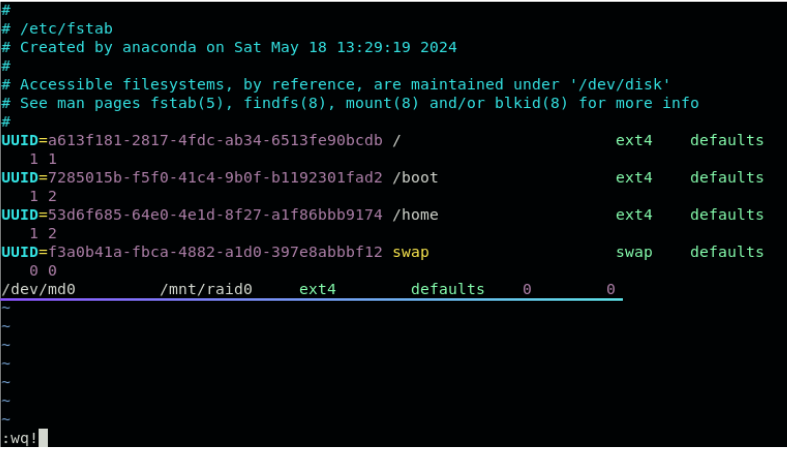
After verifying all the content and files, type the following command to mount it permanently.
[root@localhost ~]# vim /etc/fstab
/dev/md0 /mnt/raid0 ext4 defaults 0 0
:wq!
[root@localhost ~]# mount -av

Note: Verify the mounted entries
Step 8: Saving raid config file
To save the configuration file type,
[root@localhost ~]# mdadm -E -s -v >>
/etc/mdadm.conf
[root@localhost ~]# cat /etc/mdadm.conf
Note: raid level,uuid, and raid device information will be stored in ‘mdadm.conf’ file.
Optimize server speed and never lose a valuable customer again!
Our mission is to ensure that your server remains lightning-fast and protected by monitoring and maintaining it 24×7 with our experts.
Pingback: finasteride generic
Pingback: doxycycline mono 100mg
Pingback: vibramycin iv