Steps to run a POD in Node
If you’re working with the Kubernetes cluster, you know how crucial it is to manage your PODs effectively. Running a POD in a selected node can help optimize your resources and improve performance. In this blog, we will show you the steps to run a POD in a Selected Node in the kubernetes environment.
Key Takeaway
- Running a POD in the Node
- Adding a Label Node using Kubectl
- Deleting a Label in Node
Requirements
- 2 Node Cluster ( 1 Master VM with 2 Nodes)
- Kubernetes Components
Infrastructure Overview
- To begin with, we need to install and configure the 2-node cluster in our environment. We had already installed and configured the 2 Node cluster in our demo environment. To learn more check our blog post.
Adding Label to the Node using Kubectl
- Log in to the master server through putty.
- Use show labels option to view the node’s labels.
kubectl get nodes --show-labels
- Use the label command to set a label for a node.
Syntax: kubectl label <object type> <object name> <label values>
Example: kubectl lable node k8s-node2 type=hdd
- Command executed successfully.
- We can verify the label information using show labels option.
Creating a POD in NODE
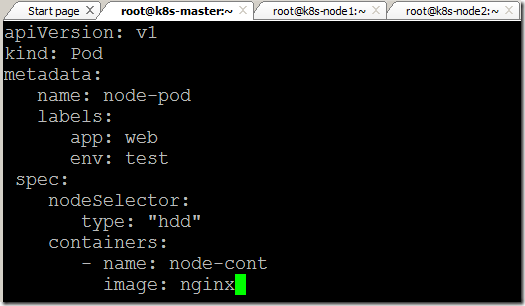
- Create a new file and paste the below coding.
apiVersion: v1
kind: Pod
metadata:
   name: node-pod
   labels:
      app: web
      env: test
spec:
   nodeSelector:
      type: "hdd"
   containers:
      - name: node-cont
        image: nginx
- Save and close the file.
- Create a new POD using the YAML file.
- Command executed successfully.
- Verify the pod status using wide option. We can see our new POD is assigned to node2 using the node labels.
Deleting a Label from NODE
- Use the below command to delete a label from a node.
Syntax: kubectl label <object type> <object name> <label value>-
Example: kubectl label node k8s-node2 type-
- Command executed successfully.
- Verify the changes.
Video Tutorial
Thank you for taking the time to read our blog on “Steps To Run A POD In A Selected Node In The Kubernetes”. We hope you found the information valuable and insightful. If you find any issues with the information provided in this blog don’t hesitate to contact us (info@assistanz.com).
Optimize your kubernetes and never lose a valuable customer again!
Our mission is to ensure that your containers remain lightning-fast and protected at all times by monitoring and maintaining it 24×7 by our experts.
Related Post
How to create the first POD in kubernetes?
How to access the POD from outside the K8s cluster?


