Hello, we are excited to share with you the process of creating replication sets in Kubernetes. Kubernetes is an open-source container orchestration platform that simplifies deploying and managing containerized applications. Replication sets are a fundamental feature of Kubernetes that ensures the high availability and scalability of your applications. In this blog, we will show you the Steps to create Replica sets in the Kubernetes environment.
Requirements
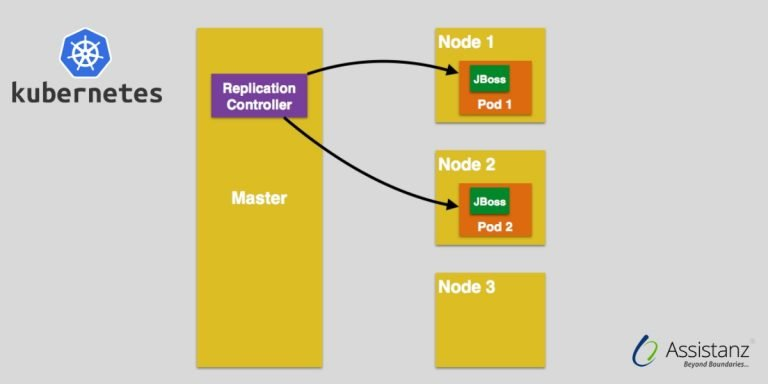
- 2 Node Cluster ( 1 Master VM with 2 Nodes)
- Kubernetes Components
Infrastructure Overview
- To begin with, we need to install and configure the 2-node cluster in our environment. We had already installed and configured the 2 Node cluster in our demo environment. To learn more check our blog post.
Overview of PODs
- Currently, there are four orphan PODs which was created by using the replication controller.

- All the PODs are labeled with app=web env=test.

- We will show you how to add the orphan pods into a Replica Set.
Benefits of Replica sets

Creating a new replica set
- From the master node, open the default text editor.

- Add the below script in the YML file.
apiVersion: apps/v1beta2
kind: ReplicaSet
metadata:
    name: rs-web
spec:
    replicas: 4
    selector:
       matchLabels:
          app: web
    template:
       metadata:
          labels:
             app: web
             env: test
       spec:
          containers:
          - name: rs-pod
            image: nginx

- Save and close the file.
- Use the below command to create a new replica set.
kubectl apply -f rs.yml

- A new replica set is created successfully.

Verifying the replica set
- Use the below command to view the list of replica sets available in your environment.
kubectl get rs

- It added the orphan pods into the replica set. Also, it has not created any additional pods for the replica set.

- We can also describe the replica set using the below command.
Syntax: kubectl describe rs <replica set name>
Example: kubectl describe rs rs-web

- There are more expressions available for the replica set and will share that information in future blogs.
Thank you for taking the time to read our blog on “How to create the K8s replication sets? – Simple guide”. We hope you found the information valuable and insightful. If you find any issues with the information provided in this blog don’t hesitate to contact us (info@assistanz.com).
Optimize your kubernetes and never lose a valuable customer again!
Our mission is to ensure that your containers remain lightning-fast and protected at all times by monitoring and maintaining it 24×7 by our experts.
Related Post
Basic overview of the Kubernetes and its Architecture
How to create a custom namespace in the K8s environment?