Steps to create a POD with labels using KUBECTL and YAML
In this blog, we will show you the steps to create a POD with labels using KUBECTL and YAML file in your environment.
Requirements
- 2 Node Cluster ( 1 Master VM with 2 Nodes)
- Kubernetes Components
Infrastructure Overview
- To begin with, we need to install and configure the 2-node cluster in our environment. We had already installed and configured the 2 Node cluster in our demo environment. To learn more check our blog post.
Creating POD with labels using kubectl
- Log into the master server through putty.
- use the below command to create a pod with labels.
Syntax: kubectl run <pod name> --image=<container image name> --port=<container port> --labels="<value1>,<value2>" --generator=run-pod/v1
Example: kubectl run lab-pod --image=nginx --port=80 --labels="app=web,env=dev" --generator=run-pod/v1
- The command executed successfully.
- After few seconds, the POD will be in running state.
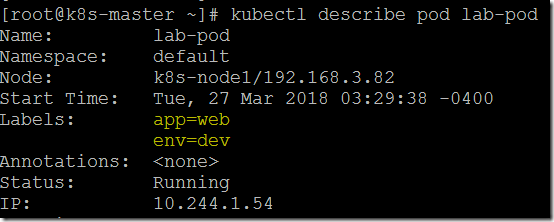
- you can verify the label details using the describe command.
kubectl describe pod lab-pod
Creating POD with labels using YAML
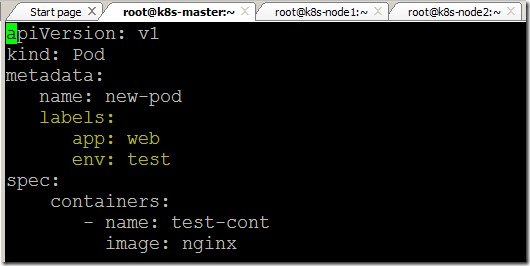
- Create a YAML file and paste the below coding.
apiVersion: v1
kind: Pod
metadata:
    name: new-pod
    labels:
       app: web
       env: test
spec:
     containers:
        - name: test-cont
          image: nginx
- Save and close the file.
- Use the below command to create a POD using the YAML file.
- Command executed successfully.
- After few seconds, the POD will be in running state.
Listing the POD labels
- We can list the all pod labels using this command.
kubectl get pods --show-labels
- We can also use the label selector to filter the required pods.
kubectl get pods -l env=test
Creating a new label for POD
- use the below command to create a new label for a pod.
Syntax: kubectl label <object type> <object name> <label values>
Example: kubectl label pod new-pod version=0.1
- Verify the new label information.
Modify the existing label
- Use the below command to update the existing label information.
Syntax: kubectl label <object type> <object name> <label values> --overwrite
Example: kubectl label pod new-pod version=2 --overwrite
- Verify the changes using show labels option.
Deleting label POD
- Use the below command to delete a label for a POD.
Syntax: kubectl label <object type> <object name> <label value> -
Example: kubectl label pod new-pod version-
- We can verify the settings use show labels option.
Video Tutorial
Thank you for taking the time to read our blog on “How To Create POD With Labels By Using Kubectl And YAML?”. We hope you found the information valuable and insightful. If you find any issues with the information provided in this blog don’t hesitate to contact us (info@assistanz.com).
Optimize your kubernetes and never lose a valuable customer again!
Our mission is to ensure that your containers remain lightning-fast and protected at all times by monitoring and maintaining it 24×7 by our experts.
Related Post
Steps To Run A POD In A Selected Node In The Kubernetes
How to access the POD from outside the K8s cluster?


