Creating custom NAT network in windows container
In this blog, we will show you creating custom NAT network in windows container using docker commands.
INTRODUCTION
The windows container networks are similar to virtual networks like HYPER-V, VMWARE. The container will have virtual NIC which connected to a virtual switch. We can also create our own virtual networks, customize IP address space.
NAT NETWORKING OVERVIEW
- Go to PowerShell window and type the below command to get the network information.
Get-ContainerNetwork
- This network (NAT) defined by default while building the container host on windows 2016 server. The subnet that defined for this network is 172.23.176.0/20. As we spinning up the containers, the virtual NIC in this containers has been gone into this network. So containers have to use this network to reach the internet.
WINDOWS CONTAINER NETWORK TYPES
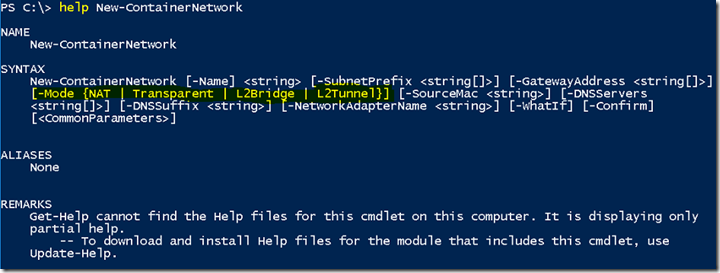
- There are four types of network types available for docker networking. Go to PowerShell window and type below command to view the help page of new-containernetwork cmdlet.
help new-containernetwork
- The four network driver options are NAT, Transparent, L2Bridge and L2Tunnel.
NAT – We will get the NAT (Network Address Translation) network by default. The container in this network will be in the isolated network. To reach the internet they need to use the IP address of windows container host.
Transparent – It’s little bit different to NAT. Each container in this network will get an IP address from the physical network of windows container host. It’s similar to bridged network.
L2Bridge & L2Tunnel – These two networks drivers are using for public and private cloud deployments. It’s great for SDN (Software Defined Network) network environments. Typically we will use L2 type networks in multiple container host environments.
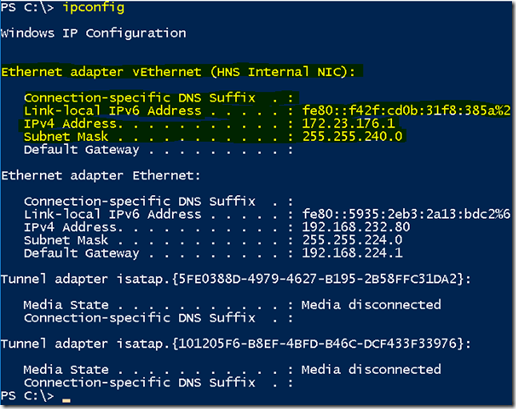
- Go to PowerShell window and type ipconfig command.
- You can see the virtual ethernet adapter that has an IP address as 172.23.176.1and subnet mask as 255.255.240.0. Our physical network has the IP address of 192.168.232.80 and subnet mask as 255.255.224.0.
- By default, the containers that we launch in this container host will go to 172 network.
- Launching a container using docker run command to check the default NAT networking.
docker run –it microsoft/nanoserver
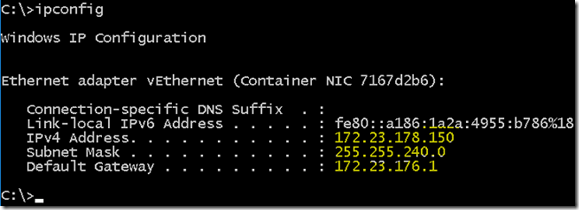
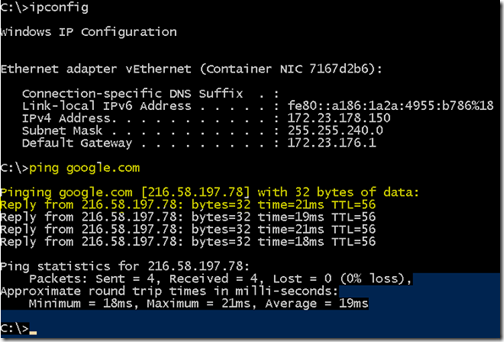
- Once the container is up and running, type ipconfig inside the container.
- The IP address that has assigned to this container is 172.23.178.150. Since NAT has been configured, we will able to ping the internet domain.
CREATING CUSTOM NAT NETWORK
- As if we are using this address space 172.18 already, we can create our own NAT network for our environment. To do that, stop the docker service using below command.
stop-service docker
- Remove all the container network using the below command.
Get-ContainerNetwork | Remove-ContainerNetwork
Press A to confirm the deletion.
- To customize the address space for NAT network, we need to add the content in the daemon.json file. Use the below command to create the daemon.json file under C:\ProgramData\docker\config folder.
New-Item –ItemType file –Path C:\ProgramData\docker\config –Name daemon.json
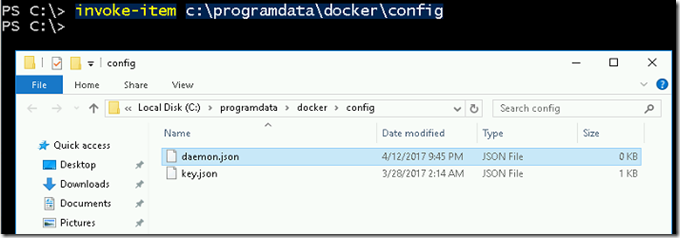
- Navigate the C:\ProgramData\docker\config folder using invoke-item command.
invoke-item c:\programdata\docker\config
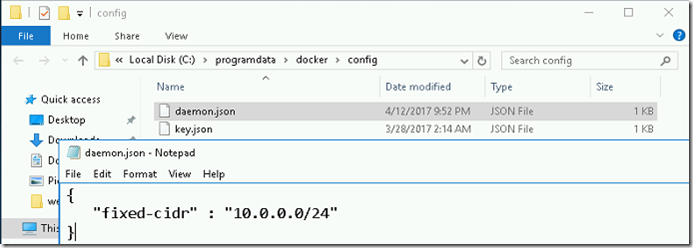
- Add the below content in daemon.json file.
{
“fixed-cidr” : “10.0.0.0/24”
}
- Save the file and close it.
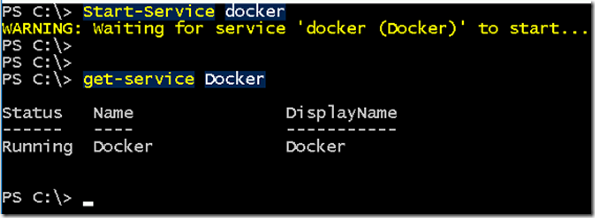
- Start the docker service using below command.
Start-Service docker
- Docker service is up and running fine. Check the NAT networking status using below command.
Get-ContainerNetwork
- The subnet CIDR has been changed to 10.0.0.0/24 network. We have successfully modified network address space.
- Create a new container and make sure this new network works. Create a new container using the below command.
docker run -it microsoft/nanoserver
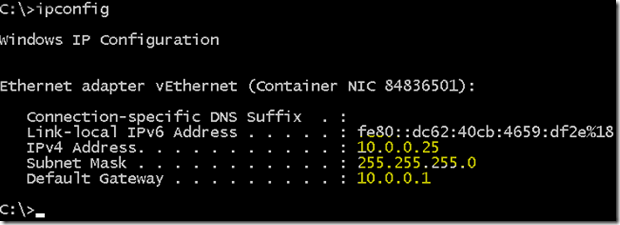
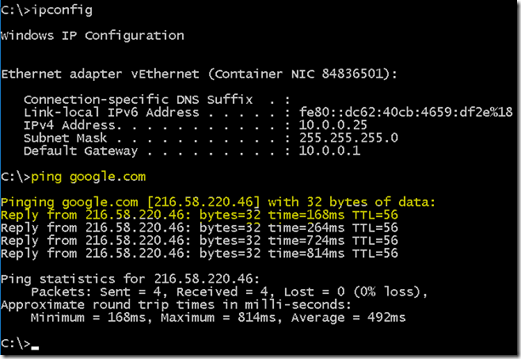
- Once the container is up and running type ipconfig to check the IP address information.
- Also, we are able to ping the internet domain without any problem.
VIDEO
Thanks for reading this blog. We hope it was useful for you to learn how to create a custom NAT networking in windows container.

Loges


